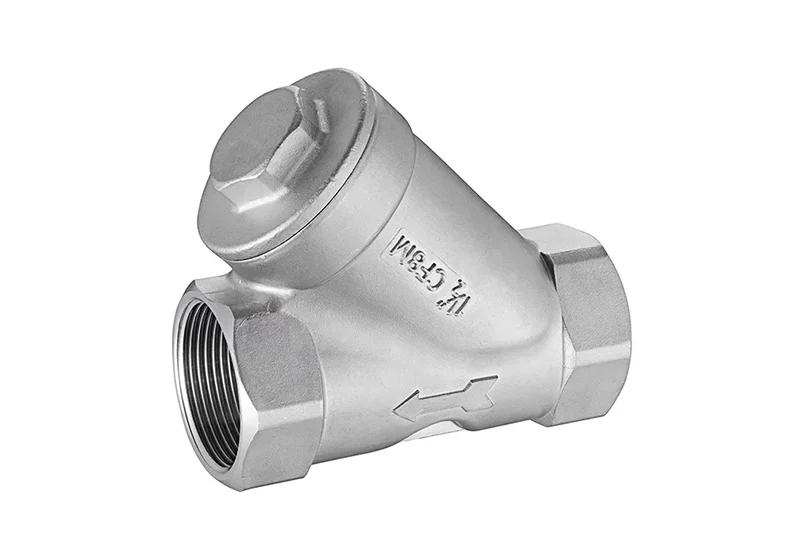
A Y-type strainer is a coarse filtration device used in piping systems to physically intercept solid impurities within a fluid. Named for its Y-shaped housing, it is widely employed to protect downstream equipment.
Proper installation is essential for a Y-type strainer to function effectively. This guide provides a step-by-step walkthrough of the installation process, from pre-installation preparation to post-installation testing.
Pre-Installation Preparation
Begin by gathering the necessary tools, such as wrenches, PTFE tape (or sealant), a spirit level, a pressure gauge, and a soap-water solution for leak testing. Next, verify that the strainer’s model, nominal diameter, and pressure rating match the piping system specifications; replace the unit if it is incompatible. Carefully inspect the strainer body, filter mesh, and gaskets to ensure they are free from dents, deformation, or other damage.
Once these checks are complete, close the system’s main valve and use compressed air to purge the piping, ensuring all residual impurities are removed. You may then proceed with the installation.
Installation Process
Step 1: Select the Installation Location
The strainer should ideally be installed upstream of the equipment it is intended to protect, such as pumps, valves, or instruments. Ensure there is at least 30 cm of clearance below the drain port to facilitate future removal of the cover for mesh cleaning. Mark the cutting lines on the pipe based on the strainer’s connection dimensions, and avoid areas exposed to direct sunlight or intense vibration.
Step 2: Pipe Cutting and Deburring
Cut the pipe along the marked lines using a pipe cutter or plasma cutter. Ensure the cut surface is flat (within a tolerance of ±0.5 mm) and use a file to thoroughly remove any burrs from the pipe ends. Use a spirit level to verify that the pipe end is perpendicular to its axis, with a deviation of no more than 1°.
Step 3: Confirm Orientation and Flow Direction
The flow-direction arrow on the strainer body must align perfectly with the direction of fluid flow in the pipe; installing it in reverse is strictly prohibited. For horizontal piping, the strainer should be oriented with the filter chamber angled downward, allowing impurities to settle at the bottom of the filter element. For vertical piping, the fluid must flow from top to bottom, and the drain port must always face downward—never upward.
Step 4: Pipe Connection
Connection methods vary depending on the type of connection.
- Threaded Connections (DN15–DN50): Apply PTFE tape (thread seal tape) to the male threads using the “three-layer wrap” method, ensuring no sealant enters the pipe interior. Tighten the connection evenly using a wrench in a diagonal pattern; apply moderate torque to avoid damaging the threads through excessive force.
- Flanged Connections (DN50 and above): Place a gasket between the flange faces, align the bolt holes, and insert all bolts. Tighten the bolts in a diagonal, alternating sequence across three stages: first to 40% of the specified torque, then to 70%, and finally to 100%. For pipes DN100 and larger, use a torque wrench; the required torque is 170–200 N·m for M16 bolts and 320–380 N·m for M20 bolts.
- Welded Connections: For argon arc welding, maintain a current of 80–120 A and a welding speed of ≥15 cm/min. Remove any non-metallic gaskets beforehand to prevent them from being damaged or burned by high temperatures.
Step 5: Leakage and Pressure Testing
Once installation is complete, testing is mandatory—specifically, bubble leak testing and hydrostatic pressure testing.
Bubble Leak Testing: Fill the filter with clean water to 1.1 times the operating pressure. Apply soapy water to the flanged connections; the absence of bubbles indicates a successful seal.
Hydrostatic Pressure Testing: Gradually increase the pressure to 1.5 times the design pressure and hold it for 30 minutes. The pressure drop must be ≤0.02 MPa, with no signs of leakage or deformation.
Installation Precautions
- Never strike or knock the filter mesh during installation, as deformation can compromise filtration precision.
- Do not stack heavy objects on the valve body, as this may cause the housing to deform or crack under pressure.
- For high-temperature applications (>150°C), use a silver-containing sealant to ensure long-term sealing reliability.
Conclusion
Y-type filters effectively capture solid impurities, thereby protecting downstream equipment. This is essential for maintaining operational efficiency and minimizing costly production downtime. Please feel free to contact us if you need anything.